Showing posts with label PhotoShop Tutorial. Show all posts

Mar 11, 2008

REPOST - Photoshop brushes


I created a cassette player stamp for fun and thought why not share it in brush form. brushes by bucket


I know the last link already expired, so here is your chance to get them again. :-)

Mar 6, 2008

How to create an animated Blog Header

I always hear... bucket how did you do that, when it comes to my blog header. In this tutorial I will show you how I did that... LOL... any questions? please email me.

-bucket

~ * ~ *~* ~ * ~ *~* ~ * ~ *~* ~ * ~ *~* ~ * ~ *~*

How to create an animated Blog Header

Most of us have blogs now a days, and everyone loves to create their own ‘creative’ blog header, so why not an animated blog header? I promise to make this as easy as possible.

I will be using Photoshop CS for this tutorial.

1. Create a blank image 10 inches x 3 inches, resolution 300.
2. For your first image create what will be your background image. See mine below.
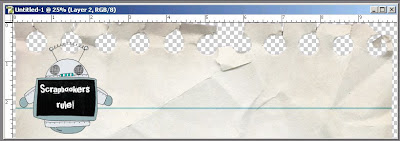


3. Now the fun begins. I want to add in another little robot who does a little dancing in the background.
4. To do that. First insert your image, then make a few duplicate copies of that image.
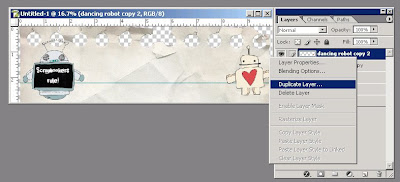
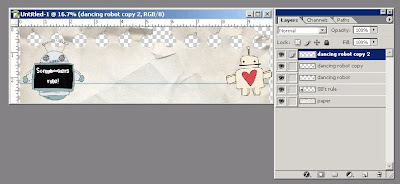


Take those duplicate copies and just start moving them around, rotate them, do whatever you like. It should look a little like this.
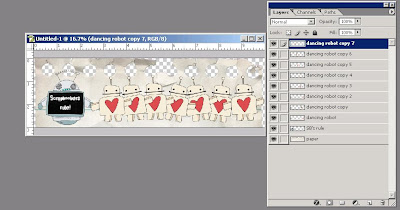
If this sounds a little confusing. Imagine this. Each layer is a new animation. Just make sure each layer goes in the order you want your gif to animate. Does that make sense? It will be further explained in the following steps.

Once you have finished playing around with your layers we will now change the image resolution size to 75. Click on Image -> Image Size -> change resolution to 75.

Now we edit our image in Image Ready. Click on File -> Edit in Image Ready.
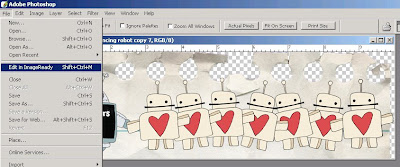


Your image on your desktop should look similar to something like this.
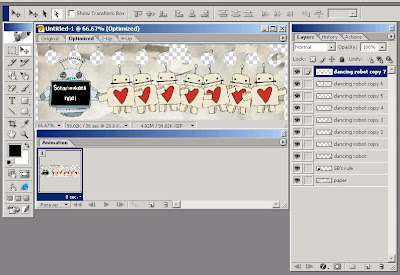


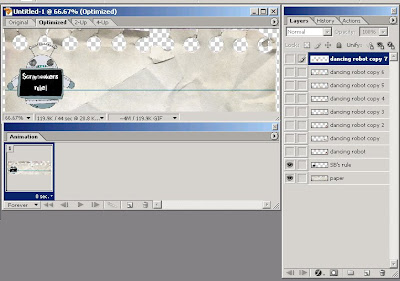
Next what you want to do is click off all the layers except your background or main image

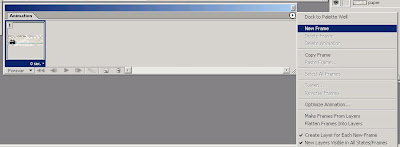
You will now need to add a frame to the animation palette. To do this click on the top right arrow, left mouse click and select New Frame. See example below.


Now once in that new frame click on your first animated layer.
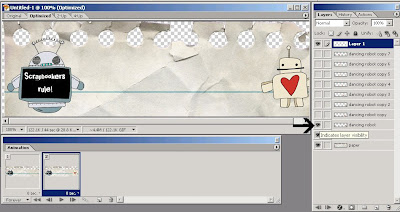


Repeat again with creating a new frame, but this time unclick your first animation and click on the second animation.
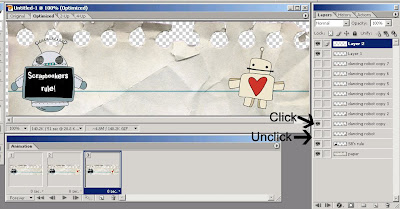

Continue repeating these steps until you have done this with each remaining layer.

Once you have completed the process set a time delay on each frame. See example below.
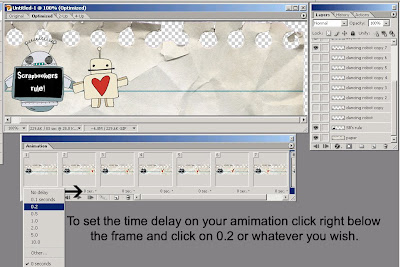


Once that is complete you can change the repeat options and then click on play to view your animation.
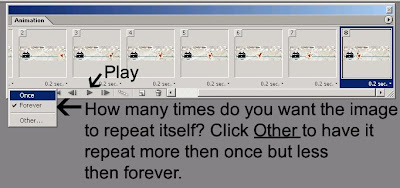


You may have to play around with the layers to get just the right animation, but once your happy with it let’s save it. Click on File -> Save Optimized As…
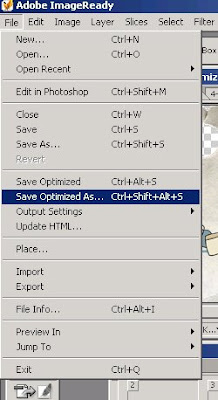


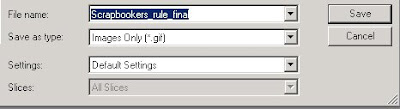
Give your file a name. Make sure your file is being saved as a gif. And then save it.


Here is my completed image.
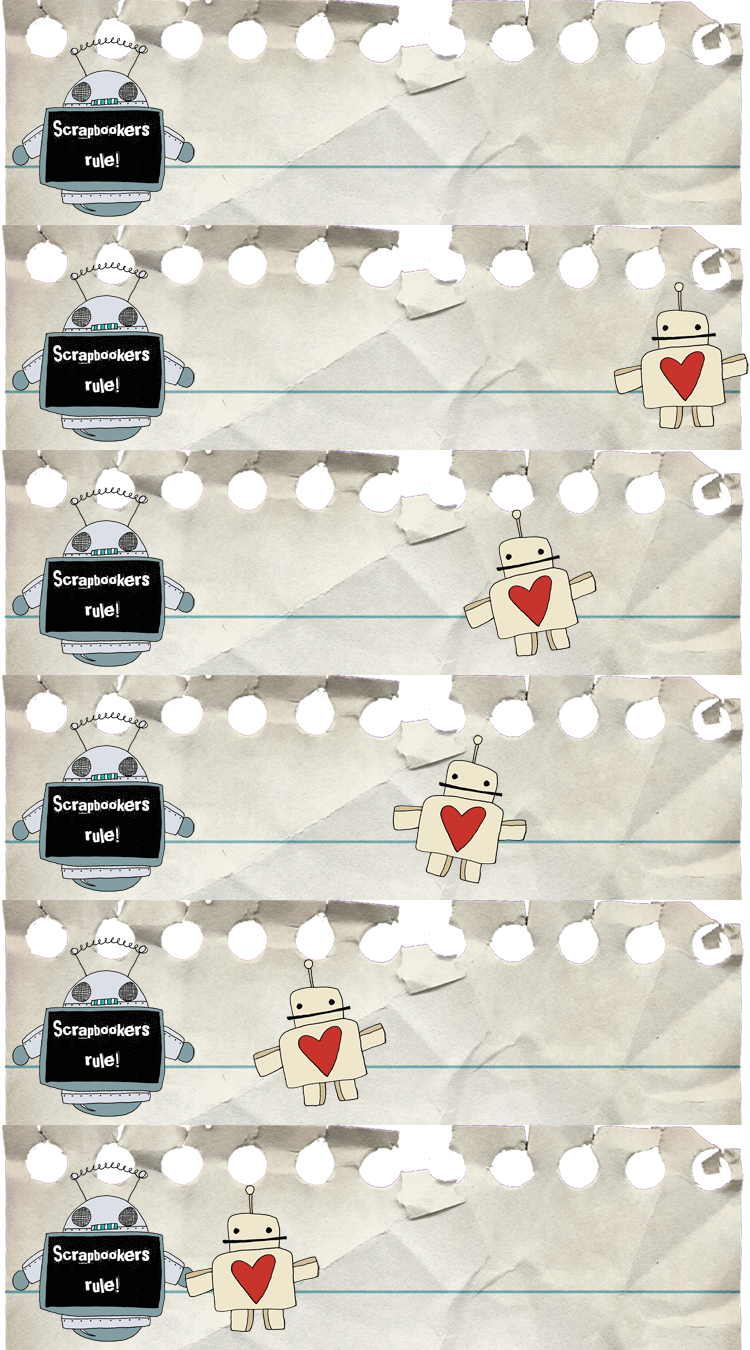

*Robots are from Twopeasinabucket.com Bot Boy Brushes & Rubons by Tia Bennett. *

Feb 8, 2008

Making your own Photoshop brushes

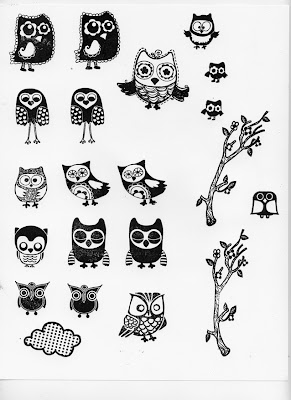
The other day I was playing around with some of my stamps and had this 'wow' moment, wouldn't an owl look cute on a digital layout. So I decided to make some into brushes. Here is a quick tutorial I wrote up on how to do it. I hope you enjoy it.

Start out by stamping your bushes on plain white paper. Try to get the best stamped image possible.

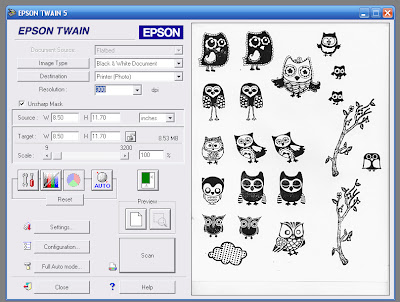
Scan in your image at a 300 resolution, and black & white document. See example below.

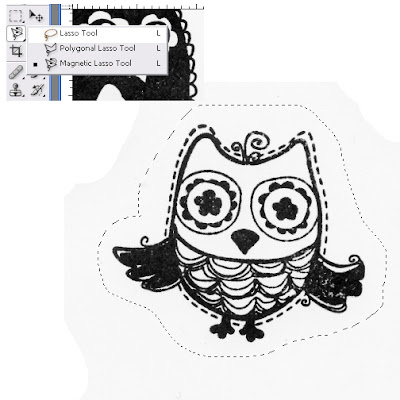
Zoom in on the first image you would like to select as your stamp, and select the image using your lasso tool. See example below.

Copy the selection and paste into a new window. Short cut keys: Ctrl – C, Ctrl – N, Ctrl – V.
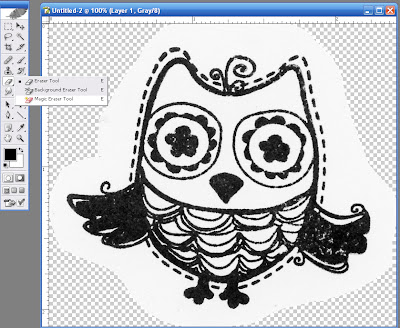
Take your magic eraser tool, or whatever tool you prefer to use to erase the white background.

Here is an example of my cleaned up image.


As you can tell my stamping wasn’t clear enough. If you’d like, you can take one of your basic circle brushes and just clean up your image a bit.

Once you feel your image is ready, let’s start creating your Photo shop brushes.

1. Click on Edit – Define Brush Preset.

2. Give your brush a name


Continue this until you have created all your brushes.

In order to save this brush set you will have to delete all the other brushes that are currently in the brush set. To do this, click on the brush selector tool and randomly delete the miscellaneous brushes in this set. See example below.


Once you have completed this you can then save your brush set.

Click on Brush Preset button, Save Brushes. Give your brushes a name. In the future when you want to bring up your favorite stamped brushes they will be saved on your computer.

I hope you found this tutorial helpful. :-)

-bucket :-)~

Jan 9, 2008

A house calendar


How cute is this? Click here to dowload this project. Check out the other calendar projects too. Some cute ideas on here! :-)
-bucket

Jan 8, 2008

Free printable desk calendar


ooohhh check this out.


Need a 2008 desk calendar? Download and print these sheets compliments of Blueprint magazine. Detach the front cover of an ordinary CD jewel case, put it on backwards, and insert the calendar pages.

Jan 7, 2008

Want some Photoshop brushes?


I created a cassette player stamp for fun and thought why not share it in brush form. The link is only good for 7 days, so please download and share it with others.
brushes by bucket


So what do you think?